How to Make an Embroidery Design Menu for Your Customers
Customers can't picture a PES file. Give them a numbered menu instead: a printable catalog of your designs, plus a one-page worksheet they approve before you stitch.
Why customers need a menu
Most embroidery customers can't picture a design from a name, and they'll never open a PES file. Ask "what would you like?" and you get "something Christmassy?", followed by twenty minutes of scrolling your phone together.
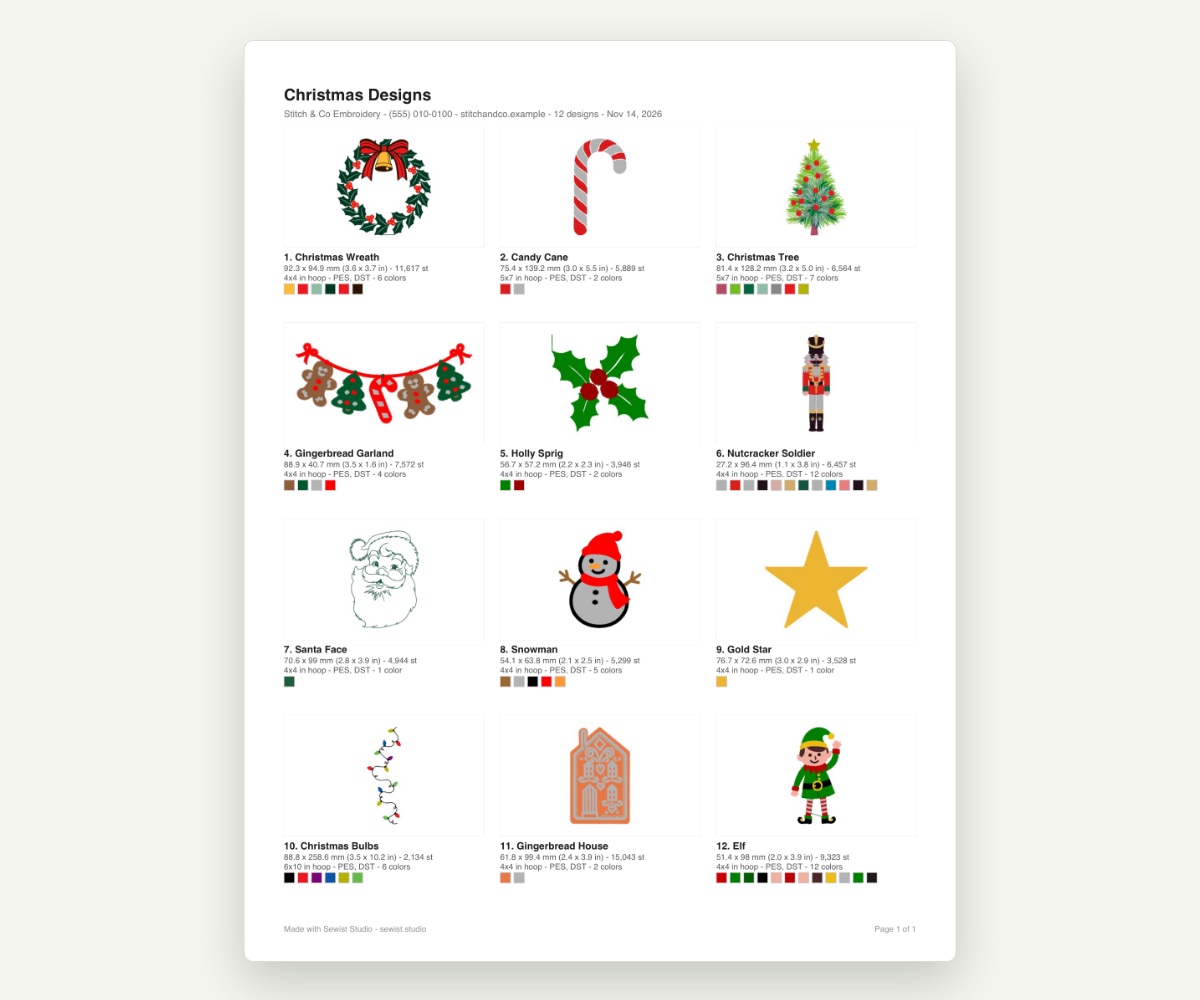
A design menu fixes that. It's a printed or PDF catalog of the designs you offer, each with a number, so a customer can say "number 7 on a red stocking, please." It works at a craft fair table, in a Facebook message, in a school or team order, and on your Etsy custom-order page.
What to put on a design menu
Every design on the menu needs:
| Item | Why it matters |
|---|---|
| A number | Customers order by number; no mix-ups between "the snowman" and "the other snowman" |
| A clear picture | They're choosing with their eyes |
| Finished size | So they know how it'll look on a bib versus a sweatshirt |
| Hoop size | Your price usually follows the hoop |
| Thread colors | So they can ask for changes up front |
| Your business name and contact | So the menu brings orders back to you |
Leave out file names and formats. Customers don't need them, and some file names don't flatter a design.
Step 1: Choose what goes on each menu
One giant menu overwhelms people. Make several small ones:
- By occasion: Christmas, Halloween, baby, wedding, back to school.
- By hoop size: a "4x4 designs" menu and a "5x7 designs" menu make pricing simple.
- By customer type: sports teams, teachers, monograms.
If your designs already live in folders like `Holidays/Christmas`, each folder is a ready-made menu. See how to organize machine embroidery designs if they don't yet.
Step 2: Narrow it down
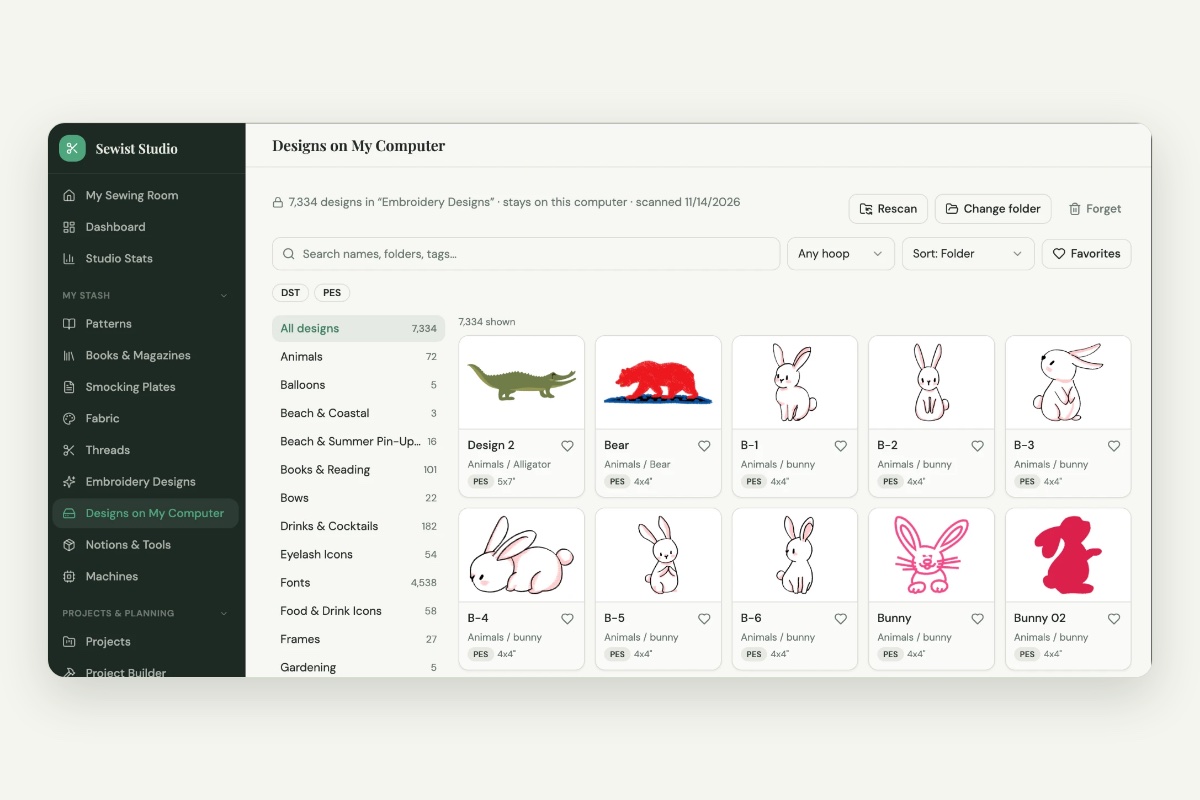
In Designs on My Computer, your design folder becomes an organized, searchable, filterable catalog, so narrowing a menu takes seconds:
- Pick the folder, for example Holidays.
- Set the hoop filter, for example Fits 4x4, to build a 4x4 price tier.
- Search to narrow further: "christmas", "santa", "monogram".
- Or heart the designs you actually want to sell, and use Favorites as your menu.
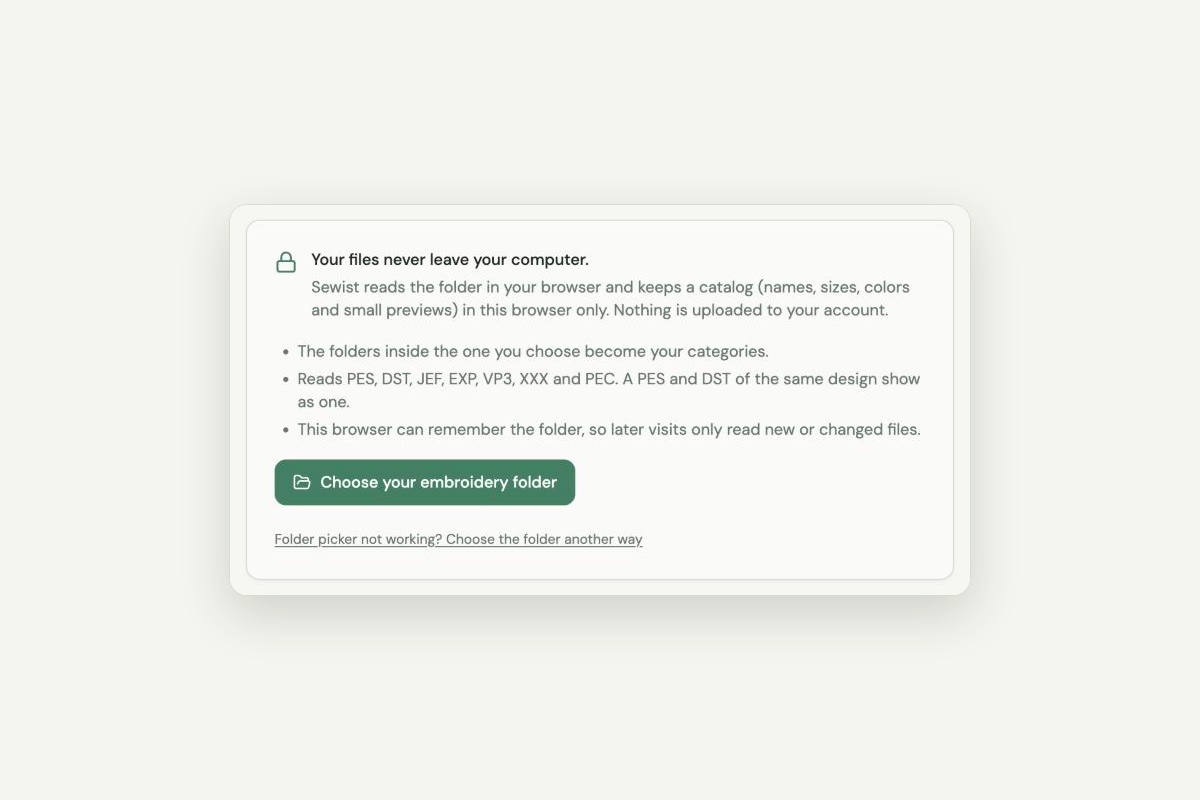
Your files never leave your computer; Sewist reads them in your browser.
Step 3: Make the PDF
Click Catalog PDF in the toolbar and choose:
- Designs: the ones shown now (your folder and filters), or your favorites.
- Title: what the customer sees at the top. Tip: put the price in it, like "4x4 Christmas designs: $12 each."
- Business name and contact line: printed under the title on every page. Sewist remembers them for next time.
- Layout: 6 per page for a showpiece, 12 for a standard menu, or 20 for a compact reference.
- Number each design: on, so customers can order by number.
- Same scale: turn it on to show how big each design really is compared with the others.
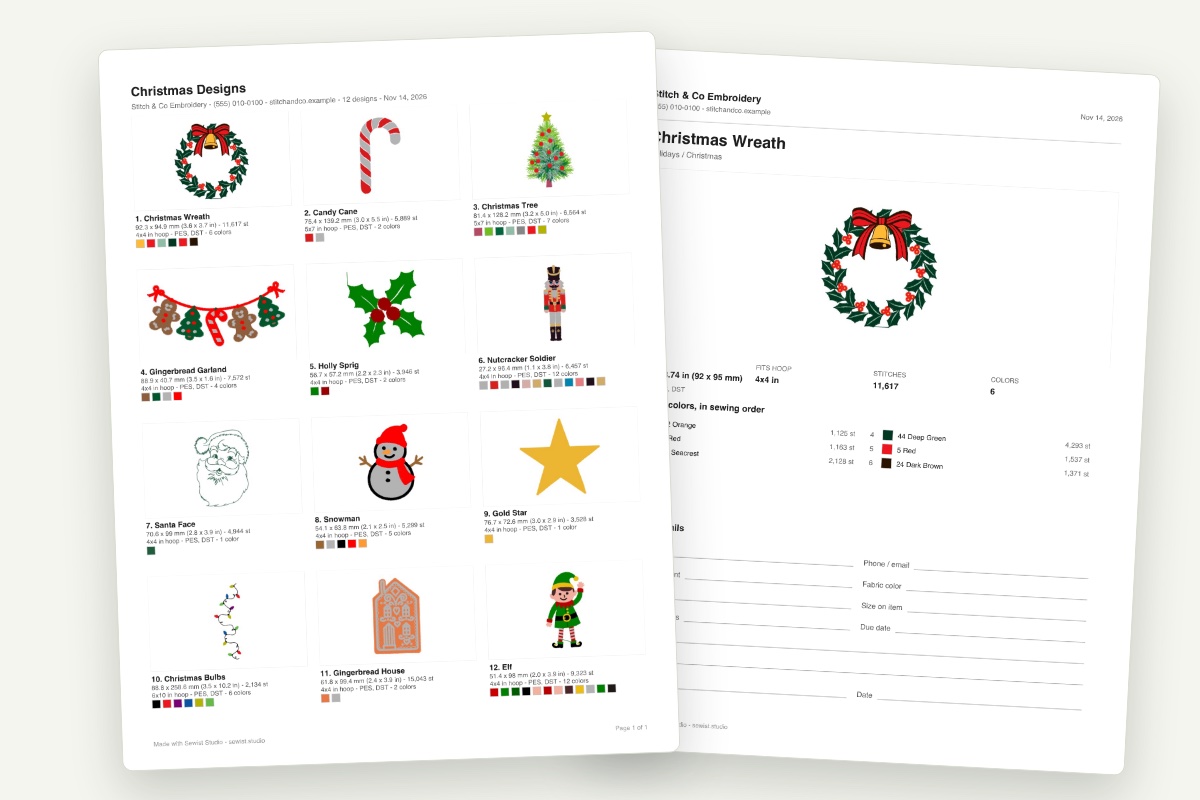
Every design gets its picture, real size in inches and millimeters, hoop, stitch count and thread color swatches. Print it, laminate it for your booth, or send the PDF in a message.
Give every order a worksheet
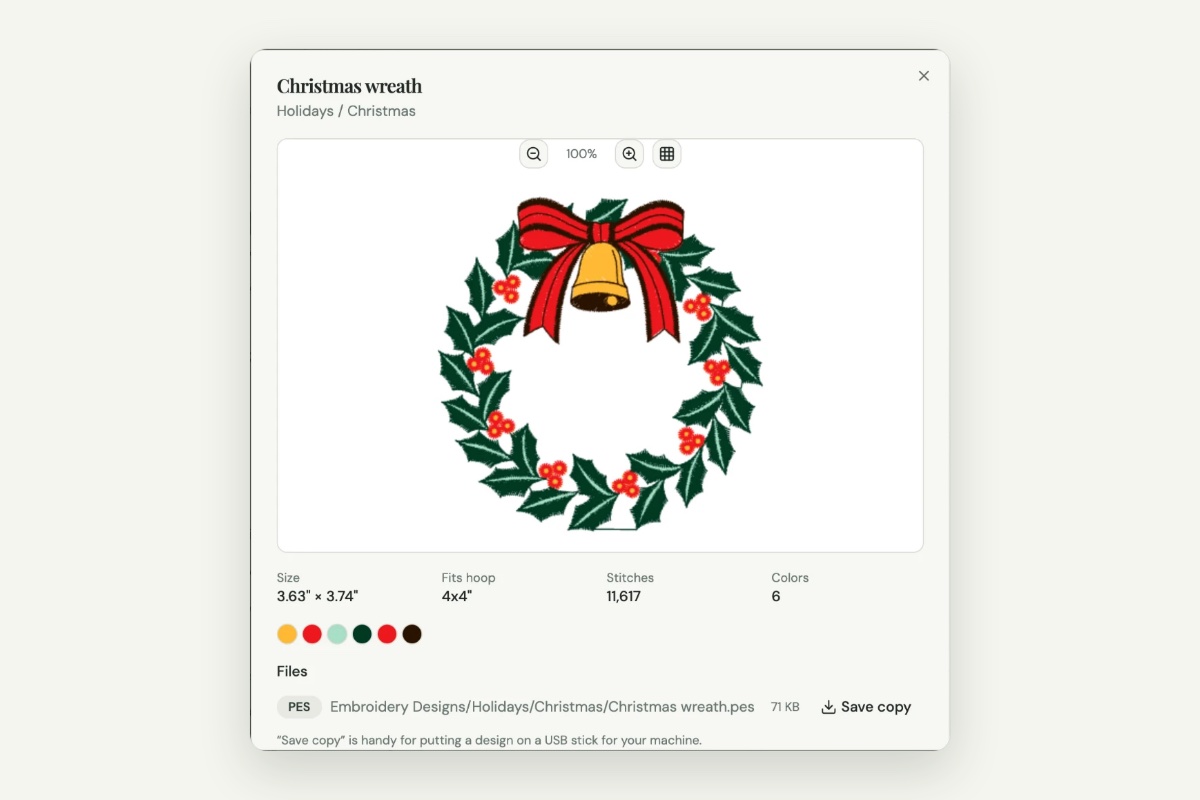
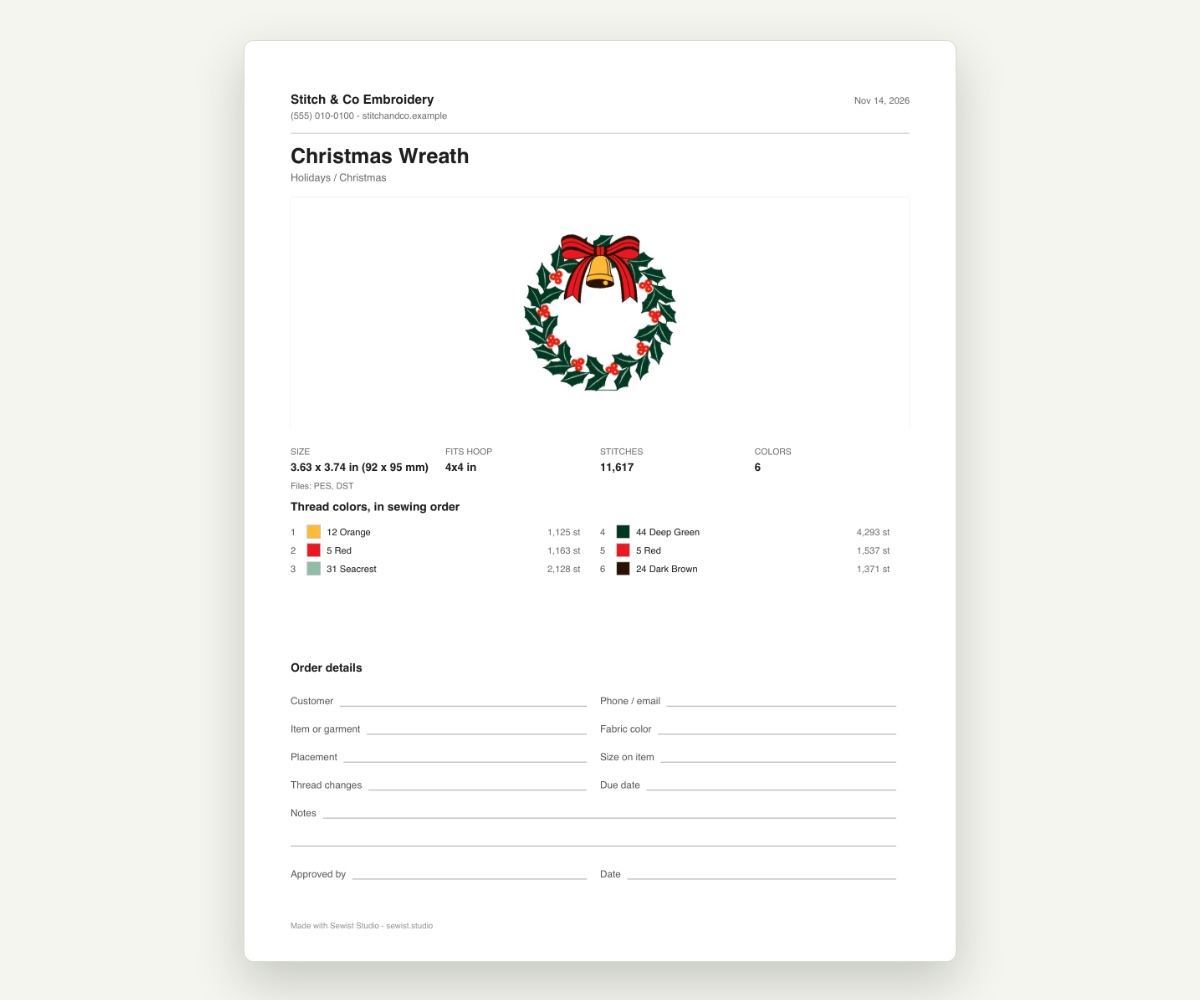
Once a customer chooses, open the design and click Print worksheet or template. The design worksheet is one page with:
- your business name, contact line and the date
- a large picture of the design
- its size, hoop, stitch count and number of colors
- the thread colors in sewing order, with thread names and numbers when the file includes them
- lines for customer, phone or email, item, fabric color, placement, size on the item, thread changes, due date and notes
- an "Approved by" and date line
Have the customer sign it (or reply "approved" to the PDF) before you stitch. It ends the "that's not the color I wanted" conversation before it starts.
The true-size template prints the design at actual size with center lines and your hoop's outline, so you can check placement on the garment before hooping.
Ways embroidery businesses use design menus
- Craft fairs and markets: a laminated menu per category, plus worksheets on a clipboard.
- School, team and church orders: one menu, everyone picks a number, one worksheet per design.
- Etsy and social media: send the PDF when a customer asks "what designs do you have?"
- Baby and wedding gifts: a short menu of names, monograms and motifs for the gift-giver.
Mind the design licenses
Most purchased designs allow you to sell items you stitch, but not to share or resell the design files. A Sewist catalog or worksheet contains pictures of your designs, not stitch files, so customers can see and choose without receiving anything they could stitch. Still, check each designer's license, especially for commercial use limits, and never send design files to customers.
Quick checklist
- One menu per occasion or hoop size.
- Numbers, pictures, sizes, hoops and colors on every design.
- Your business name and contact on every page.
- A signed worksheet for every order.
Designs on My Computer, including catalog PDFs and worksheets, is part of Sewist Studio Pro, with a 14-day free trial.