Read Pleater Setup: Threading, Loading Fabric, and First Pleats
A Read pleater looks intimidating out of the box. Here's the full setup from clamp to first pleats.
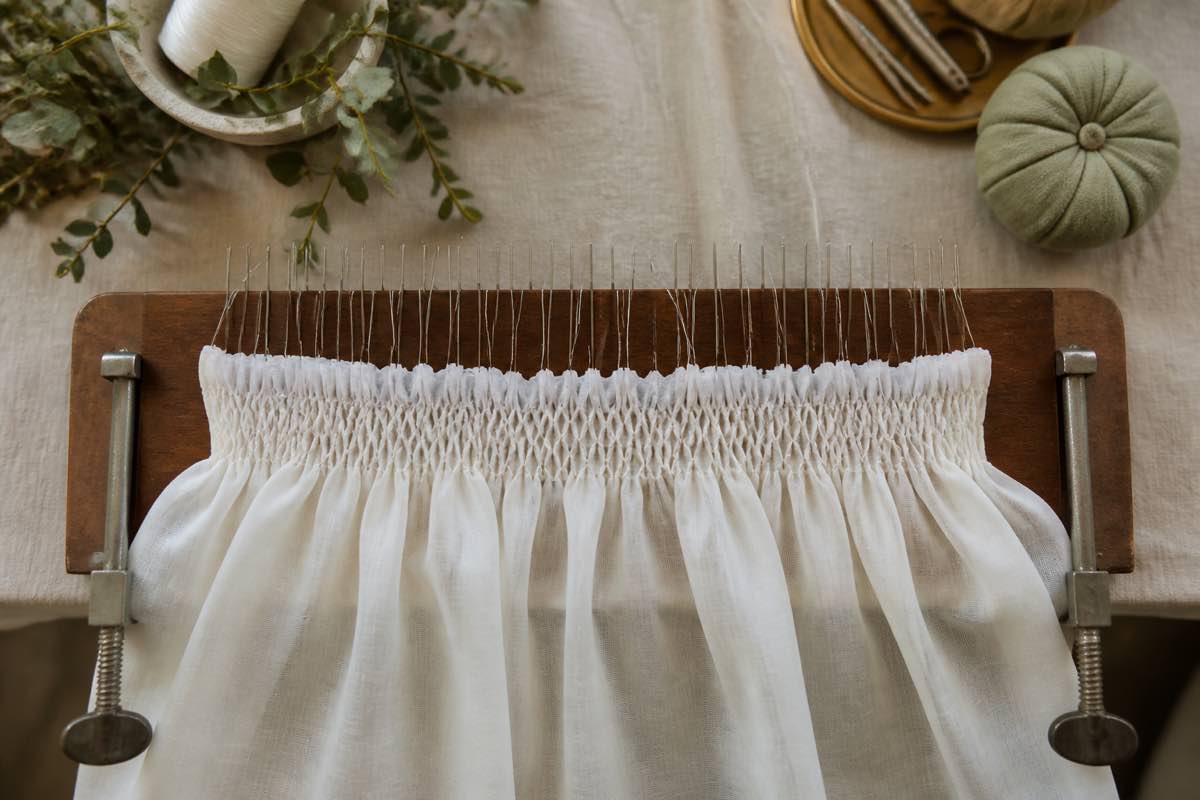
Unboxing checklist
A new Read pleater ships with:
- The pleater body with needles pre-installed
- A crank handle
- A table clamp assembly
- A spare needles envelope
- Instructions
Check that every needle row has a needle. Missing needles are cheap to replace but easy to miss.
Step 1: Clamp to a sturdy table
The pleater generates pull — a wobbly card table will not hold it. Use a solid dining or work table, clamp the pleater at the front edge, and make sure the crank clears the table underside.
Step 2: Choose your thread
Traditional pleater thread is:
- Button and carpet thread (Coats & Clark or Gutermann) — strong, glides through needles
- Or quilting thread — similar weight
Do not use standard sewing thread. It snaps under the pull of gathering.
Step 3: Thread each row
Cut lengths about 6–8 inches longer than your finished panel width. So for a 16" bishop yoke, cut 22–24" lengths.
For each row you plan to use:
1. Thread the needle from front to back.
2. Pull the thread through so there's a 4–5" tail hanging at the back of the pleater.
3. Leave the front tail long enough to grip after pleating.
Only thread the rows you need — extras waste thread and thread ends.
Step 4: Prepare the fabric
Cut fabric on grain. Off-grain fabric pleats crooked and stresses the needles.
For a bishop yoke:
- Cut a rectangle at least 3× the finished pleated width
- Press pre-shrunk fabric flat
- Trim selvage edges cleanly
Step 5: Feed the fabric in
1. Lift the top roller assembly.
2. Slide the fabric between top and bottom rollers, right side down.
3. Align one edge with the pleater's guide.
4. Close the top roller.
5. Turn the crank one full rotation to seat the fabric.
Step 6: Pleat
Turn the crank steadily. Do not force it. If it resists, stop and check for:
- Off-grain feed
- Thick seams pulled into the rollers
- A bent needle catching
The fabric emerges pleated at the back, riding on the gathering threads.
Step 7: Tie off
When the entire piece is through:
1. Grip both tails of each row.
2. Slide pleats to the finished width.
3. Tie the front and back tails together with a bow (not a knot — you'll want to release later for blocking).
Save each pleater setup
Between pleater runs it's easy to forget which rows you used, how many pleats you got from a given yardage, and which needle position gave the best result. Log every setup as a project kanban card in Sewist Studio, pull the fabric from your digital stash, and next time this pattern comes up you're not guessing.


