Bishop Dresses: How to Sew a Classic Smocked Baby and Toddler Dress
The bishop dress is the crown jewel of heirloom smocking. Here's the complete workflow from pattern to finished garment.
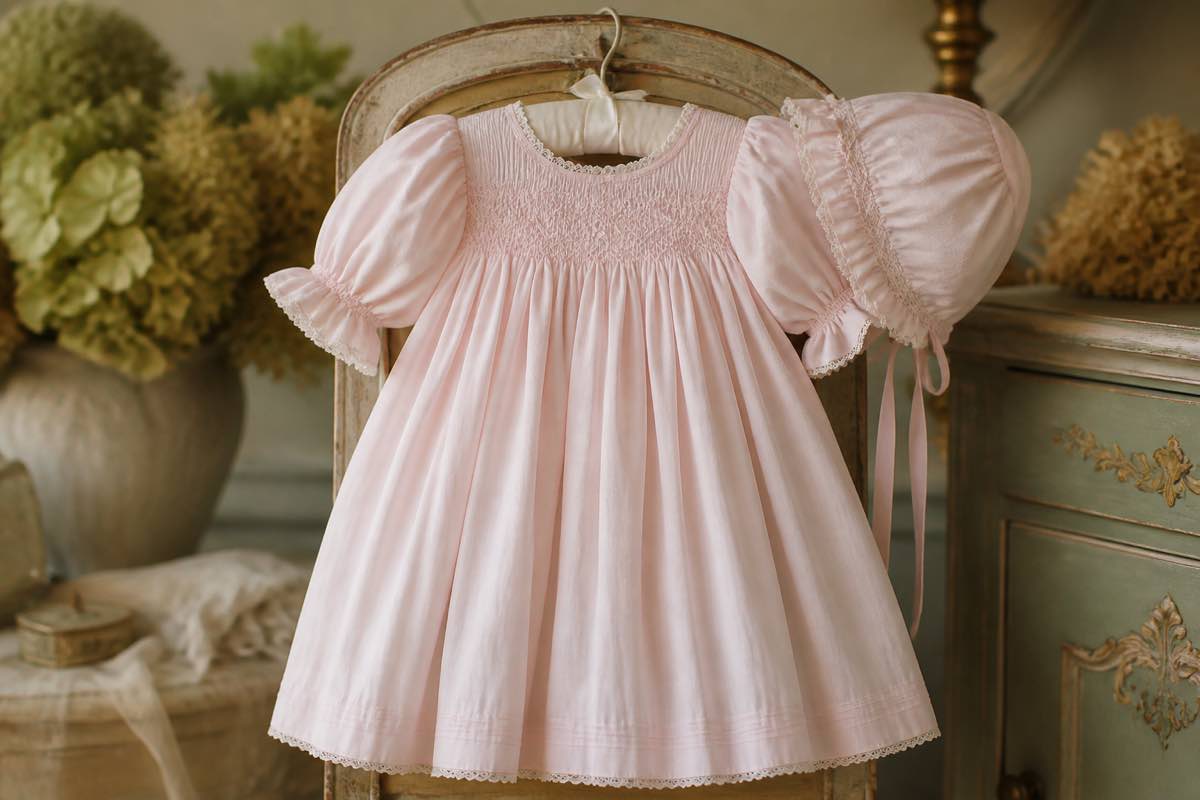
What makes a bishop different
A bishop dress is defined by its construction: the front, back, and sleeves are cut as flat pieces, joined at the shoulders and underarm seams, and then the entire neckline is pleated and smocked as a continuous curved tube. That's what gives a bishop its signature rounded shoulders and stretchy, decorative yoke.
Compared to a yoke dress (a rectangular smocked panel sewn between a flat yoke and skirt), a bishop is more advanced and more forgiving of fit — the smocked neckline stretches over the head with no button placket.
What you need
- Pattern — Children's Corner, Collars Etc., and other classic bishop patterns come in sizes 6M through 6T. Adult bishops are rare but available from independent designers.
- Fabric — 1.5–2 yards of imperial broadcloth or Swiss batiste in a 36" or 45" width.
- Smocking plate — a bishop-appropriate plate sized to your pleater row count and finished neckline.
- Floss — 3–5 DMC colors, listed on the plate.
- Pleater — 24-row minimum; 32-row for older sizes.
- Bias binding or piping — for the neckline finish.
The complete workflow
1. Cut and construct flat
Cut the front, back, and sleeves per the pattern. Sew the shoulder seams and underarm seams while the piece is still flat. Finish the neckline edge with a narrow zigzag or serger to prevent fraying at the pleater.
2. Pleat the neckline
Feed the assembled tube through the pleater, starting at a side seam and working around the entire neckline. Most bishop plates call for 12–16 rows of pleating.
3. Block and tie off
Pull the gathering threads to the finished neckline measurement listed on the pattern. Tie off each thread pair firmly. Steam-block the pleats flat and even.
4. Smock the plate
Work the smocking plate row by row starting at row 1. Keep tension consistent — every fifth row, lay the piece flat and check that the finished smocked width matches your pattern's yoke width.
5. Remove gathering threads and finish
Once smocking is complete, gently remove the top and bottom gathering threads. Bind the raw neckline with bias tape or piped bias for a clean heirloom finish.
6. Hem and press
Finish the sleeve edges (usually with a rolled hem or piped bias band) and hem the skirt. Give the finished dress a final steam press, avoiding direct heat on smocked areas.
Sizing and fit tips
- Measure the child's actual head circumference and add 1 inch — the smocked neckline must stretch over the head.
- Bishop patterns typically fit generously; consider sewing one size below the child's age if they run small.
- For a growing toddler, cut the length long and add a tuck 2 inches above the hem — you can let it down at the next growth spurt.
Track bishop projects in your studio
Bishop dresses take 15–30 hours across pleating, smocking, and finishing. That's a lot of time to lose track of. The project kanban logs fabric pulled from your digital stash, floss list, plate name, and current step, while camera cataloging keeps photos of every finished bishop as reference for the next one.
Track your bishop dress project in Sewist Studio and finish the ones that stall.
After your first bishop
Once you've finished one bishop, everything else in smocking feels approachable. The natural next steps are:
- A matching bonnet using leftover fabric and floss
- A brother's John-John in coordinating fabric
- A holiday bishop in Christmas or Easter colors, planned six months ahead
- An heirloom baptismal gown — the most ambitious version of the same construction
Save every finished bishop with photos, floss list, and fabric — you'll want that reference the next time a shower or holiday comes around.


