Visible Mending for Beginners: Make Repairs Look Intentional
A hole in your favorite jeans isn't the end — it's a blank canvas. Visible mending is the sustainable, beginner-friendly craft of making repairs you'll want to show off.
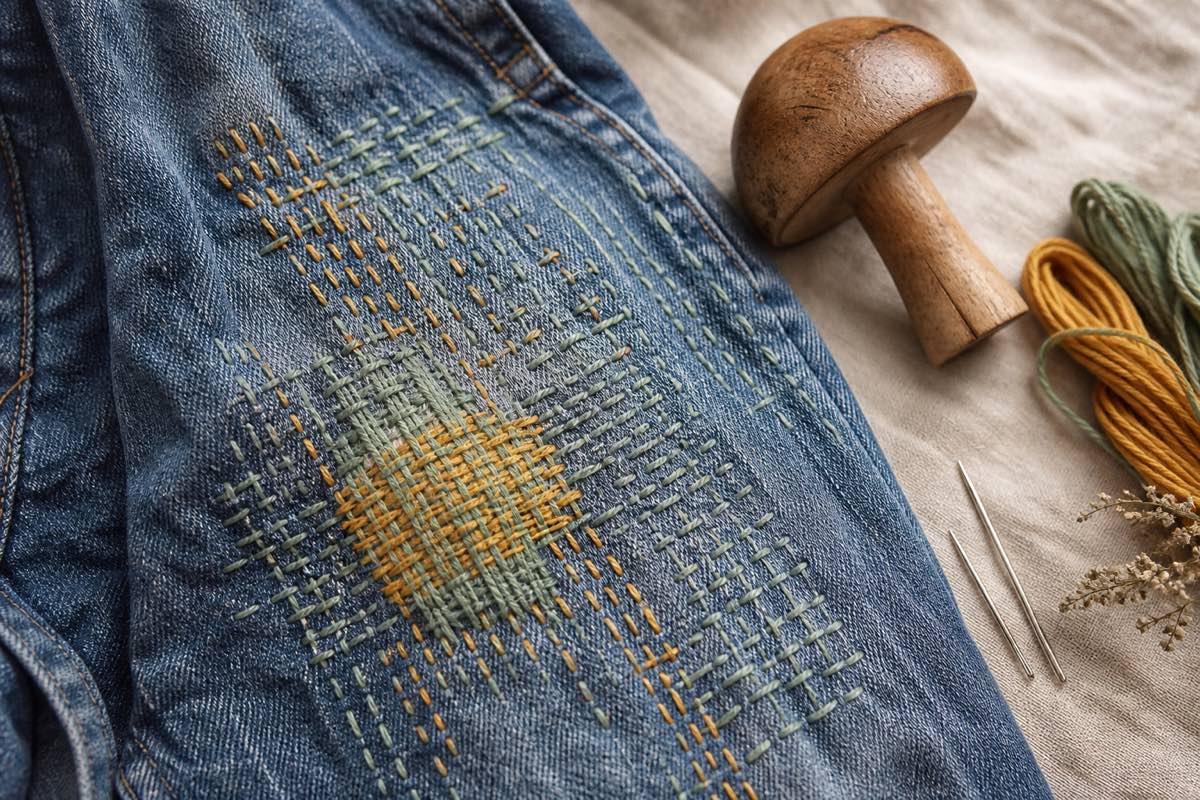
Why mend visibly instead of hiding it
For most of history, a good repair was an invisible one. Visible mending flips that: instead of disguising a fix, you make it beautiful. A frayed knee becomes a field of indigo running stitches; a moth hole becomes a tiny woven sunburst.
It's having a real moment — and not only because it looks good. Visible mending is one of the most approachable on-ramps into sewing, it keeps clothes out of landfill, and it needs almost no equipment. If you've wanted to sew but felt intimidated by patterns and machines, this is a perfect place to start with just a needle and thread.
The tiny toolkit
You genuinely need very little:
- A needle — a hand-sewing needle for wovens, an embroidery needle for thicker thread.
- Thread or embroidery floss — contrasting colors are the whole point.
- Scissors.
- A curved support — a darning mushroom is traditional, but a jar lid, lightbulb, or even an orange works to hold a knit's shape while you stitch.
Optional upgrades: sashiko thread and a long sashiko needle for running-stitch work, and scrap fabric for backing patches (a great use for your scrap fabric).
Technique 1: Sashiko-style running stitch (easiest)
Sashiko is a Japanese tradition of reinforcing fabric with rows of simple running stitches. For a beginner mend:
1. Back the damaged area with a scrap of fabric pinned behind the hole.
2. Stitch even, parallel rows of running stitch across the area, going through both layers.
3. Keep rows roughly evenly spaced — the rhythm is what makes it look deliberate.
Because the whole look is built from the simplest stitch there is, it's forgiving. Uneven stitches read as handmade charm, not error.
Technique 2: Woven darning (for knits and holes)
Darning rebuilds missing fabric by weaving new threads:
1. Stretch the hole over your darning mushroom so the fabric is taut.
2. Lay parallel "warp" threads across the hole, anchoring each well into the sound fabric around it.
3. Weave "weft" threads over and under the warp, packing them snug.
4. Work past the edges of the hole into healthy fabric so the darn doesn't pull out.
A contrasting thread turns this into a little woven medallion.
Technique 3: The patch (for bigger damage)
For a worn-through knee or elbow, a patch carries the load. Place it behind (for a subtle look) or on top (for a bold one), then secure it with running stitch, blanket stitch, or straight machine lines. This is also where a worn garment can become a refashioning project rather than a simple repair.
The secret to durable mends
The most common beginner mistake is stitching only at the edge of a hole — that just tears again next to the repair. Anchor your stitches in the sound fabric around the damage, and, even better, reinforce a thinning area before it becomes a hole. Mending pre-emptively is the most durable mending there is.
Turn your repairs into a record
Mends are oddly satisfying to look back on — and easy to forget. Logging them gives you a running portfolio of saved garments and a memory of which techniques held up.
In your project journal, create a card for each mend with a before-and-after photo and a note on the thread and technique you used. Over a year you'll build a visible record of clothes you rescued — and you'll know exactly which approach to reach for next time.
2. Photograph the damage before you start.
3. Log the technique and thread as you go.
4. Add the finished photo — your mending portfolio grows itself.
Frequently asked questions
What is visible mending?
Repairing clothes with deliberately decorative stitching so the fix becomes a feature.
What tools do I need?
A needle, thread or floss, scissors, and a curved support like a darning mushroom or jar lid.
Easiest technique for beginners?
Sashiko-style running stitch over a backing patch — forgiving and quick.
How do I mend a knit sweater hole?
Woven darning over a darning mushroom, anchored into the sound fabric around the hole.
Is it durable?
Yes, if you anchor stitches in healthy fabric and reinforce worn areas before they fail.


