Smocking for Beginners: A Complete Guide to Getting Started
Everything a first-time smocker needs — from choosing fabric and thread to your first cable and wave rows — in one beginner-friendly guide.
What is smocking?
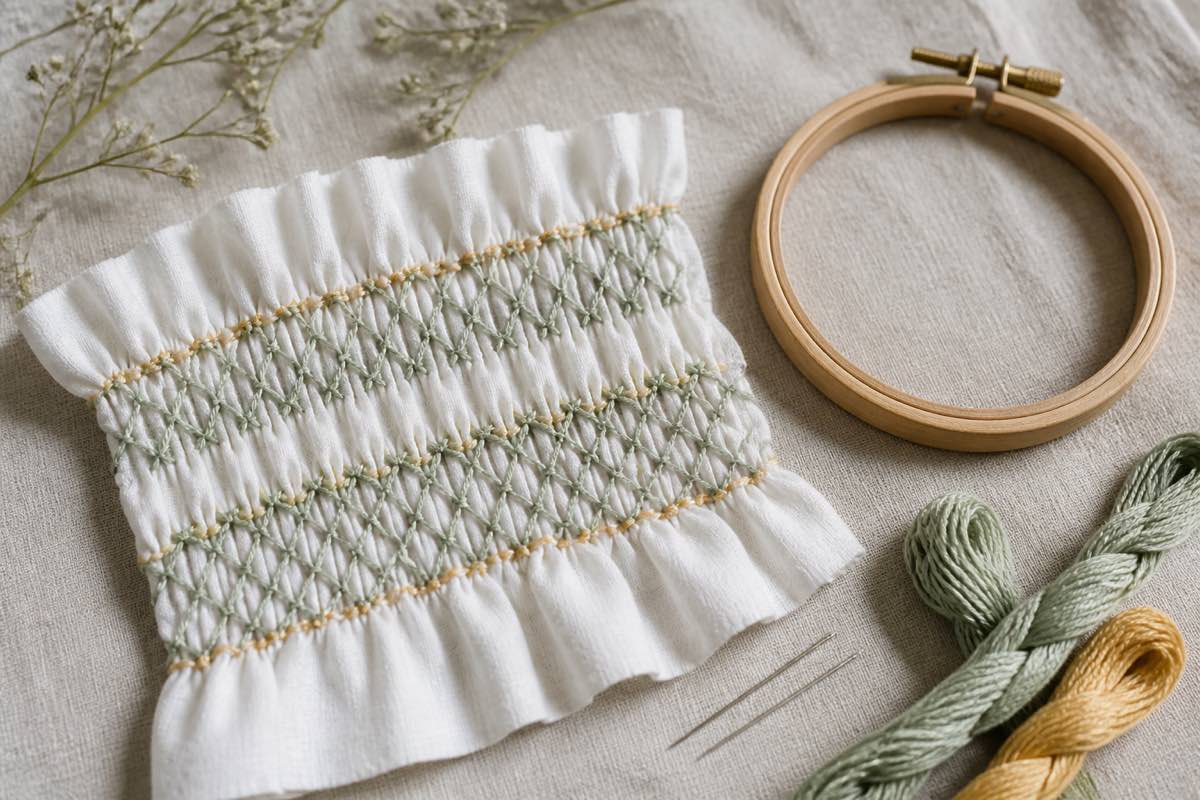
Smocking is a hand-embroidery technique that gathers fabric into narrow, even pleats and locks those pleats in place with decorative stitches worked across the tops of the folds. The result is a stretchy, textured panel used on heirloom baby dresses, cuffs, yokes, sleeves, and modern blouses.
Unlike shirring (elastic thread on a machine), smocking is worked with cotton floss by hand, so the design is permanent and highly customizable.
Supplies you actually need
You can start smocking with under $30 of supplies:
- Fabric — lightweight woven cotton, batiste, broadcloth, or fine gingham. Avoid knits and heavy wovens as a beginner.
- Pleater or dot transfer — a pleater machine gathers rows quickly; iron-on smocking dots work for small pieces.
- Floss — DMC 6-strand cotton, used with 3 strands for most stitches.
- Needles — a #7 or #8 crewel needle (long eye, sharp point).
- Hoop (optional) — most smockers work without one because the pleats give structure.
That's it. No machine, no software, no expensive kit.
The first stitches every beginner learns
Every smocking design is built from a small stitch vocabulary. Start with:
1. Cable stitch — the foundation. A tight, straight row that anchors the top of your design.
2. Wave stitch — climbs up and down between two rows, creating diamond and honeycomb shapes.
3. Trellis — a stretched wave that spans more rows, used for larger geometric fields.
4. Bullion knot — a wrapped knot used for rose centers in picture smocking.
Practice each one across four to six pleater rows on a scrap before starting a real project. Full step-by-step diagrams live in the Smocking & Stitching Encyclopedia.
Your first project
The classic beginner project is an insertion sample — a 6-inch by 10-inch pleated rectangle where you try a new stitch row every inch. Save the finished sample as a reference. It becomes your personal stitch library.
From there, the natural progression is:
1. Insertion sample (stitches only)
2. Simple cuff or pocket panel
3. Baby bonnet or bib
4. Bishop-style dress front
Track your practice in Sewist Studio
Beginners often lose momentum because they forget which stitch combinations worked. Sewist Studio's camera cataloging lets you photograph each finished sample, tag it by stitch and floss color, and file it alongside the fabric in your digital stash — then plan your next make on the project kanban so you never start from a blank page.
Create a free Sewist Studio account and log your very first smocking sample tonight.
Where to go next
Once cable and wave feel comfortable, read How to Read a Smocking Plate and browse the Smocking Stitch Library for the intermediate stitches. Every plate in your future collection is built from the same small alphabet you're learning now.


